之前我们用 Helm 在 Kubernetes 上部署了 OpenSearch 集群,使用默认的数据库密码进行登录。今天来介绍如何接入 Amazon Cognito 作为 OpenID Connect(OIDC)身份提供商,让Dashboard 实现企业级 SSO 单点登录,同时让 OpenSearch API 也支持 JWT Token 认证。
OpenID Connect 的提供商我选择了 Amazon 的 Cognito,然后对应的Dashboards(前端跳转)和 OpenSearch Security(后端验证)都要单独来做集成。
OIDC 是通用协议,Cognito 只是本文选的提供商,换 Keycloak、Okta、Auth0 都一样
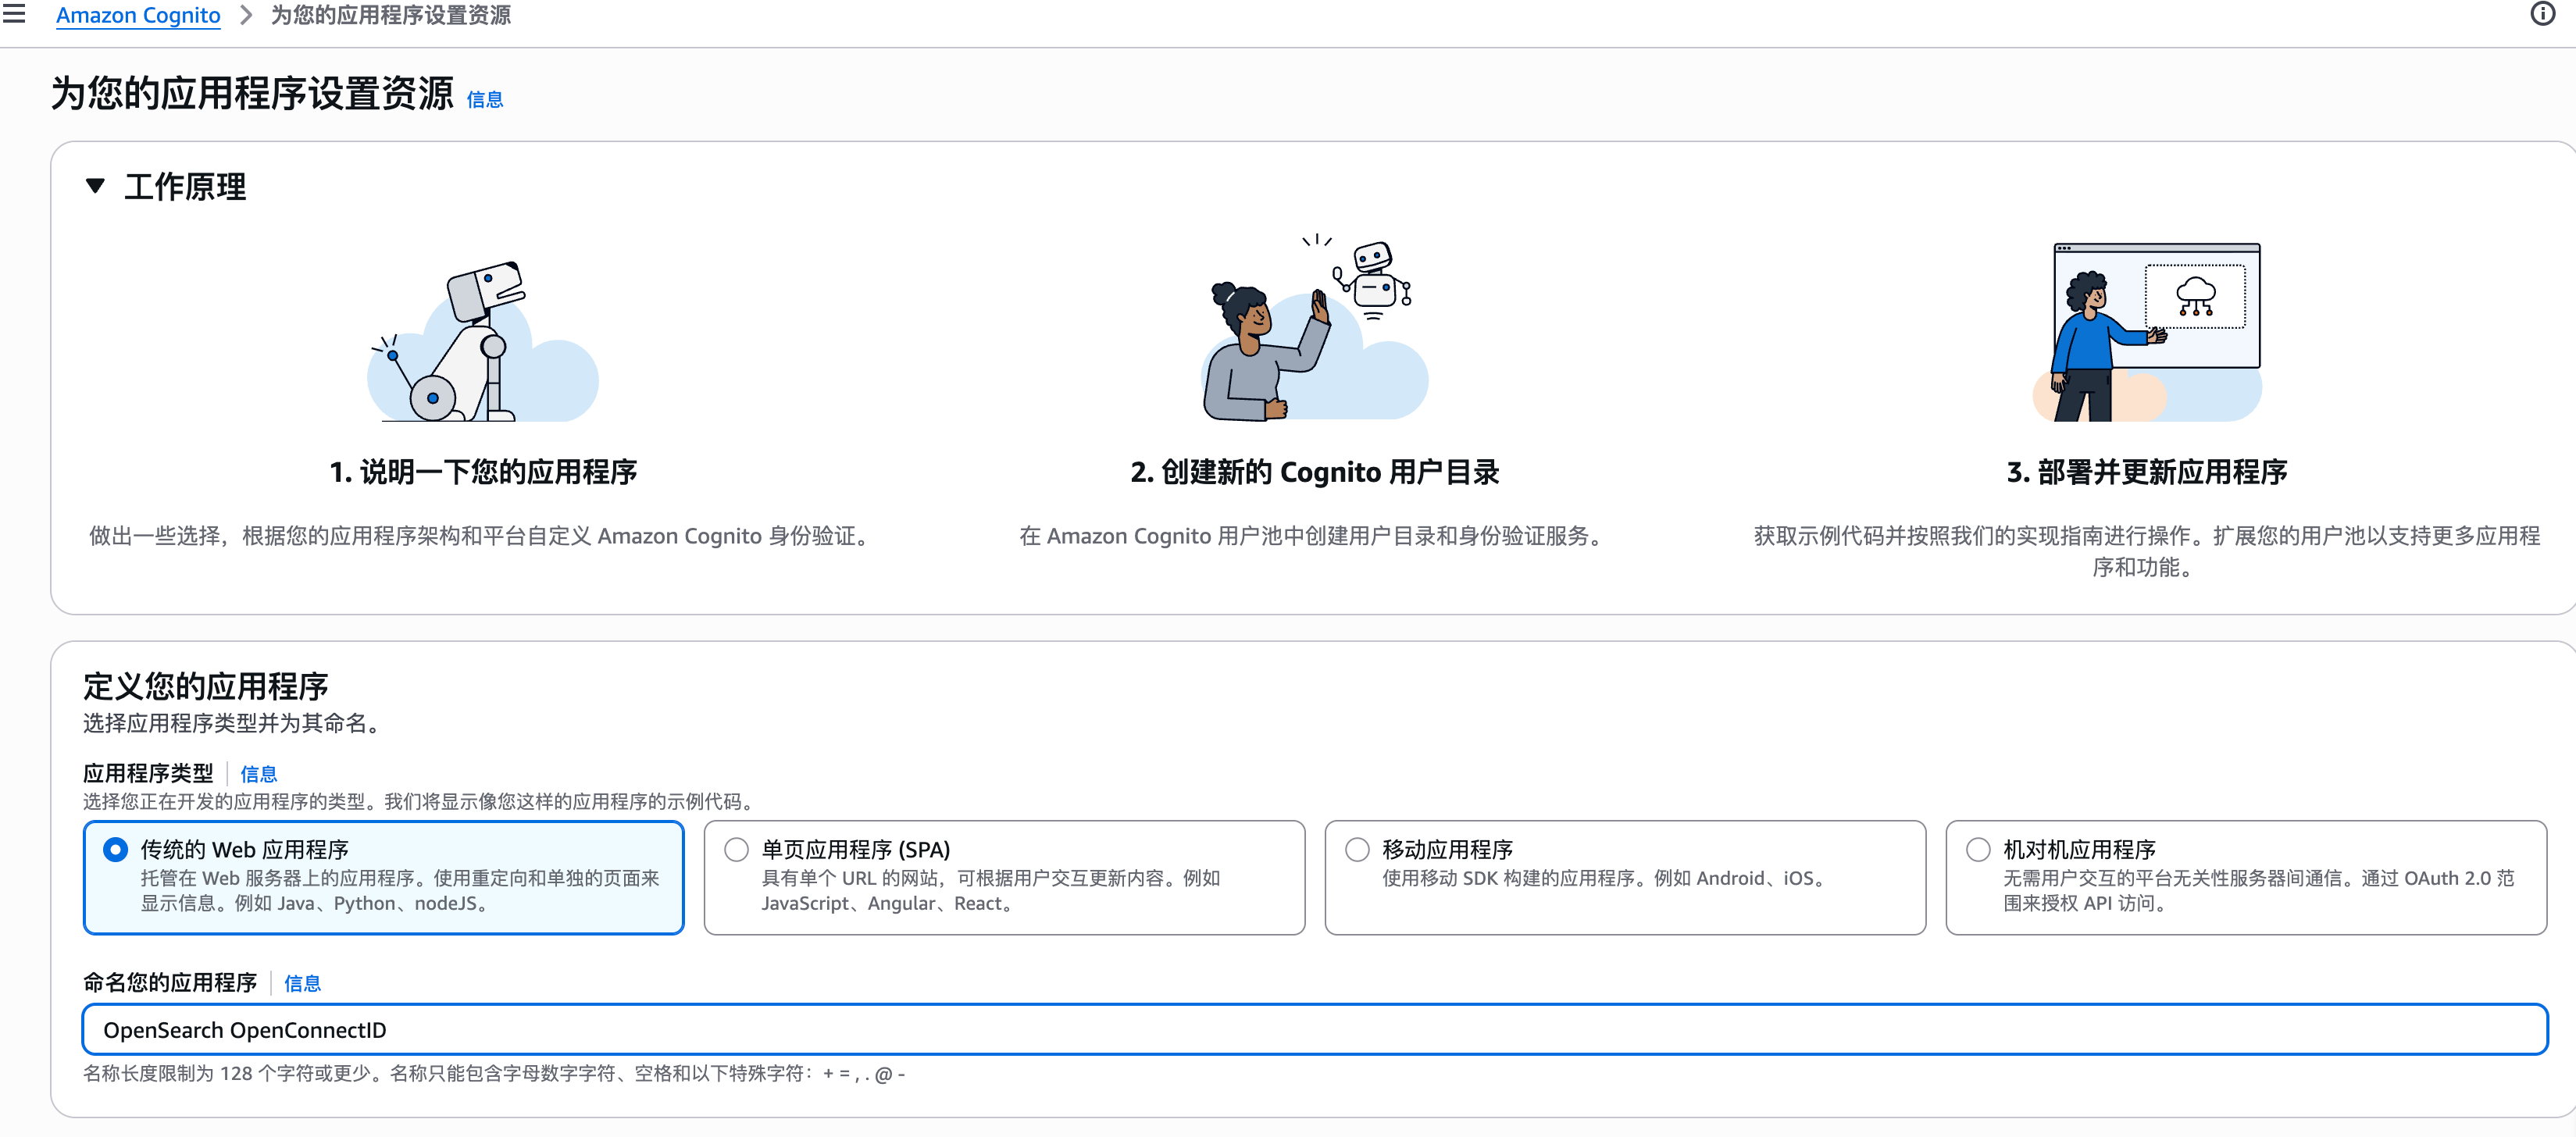
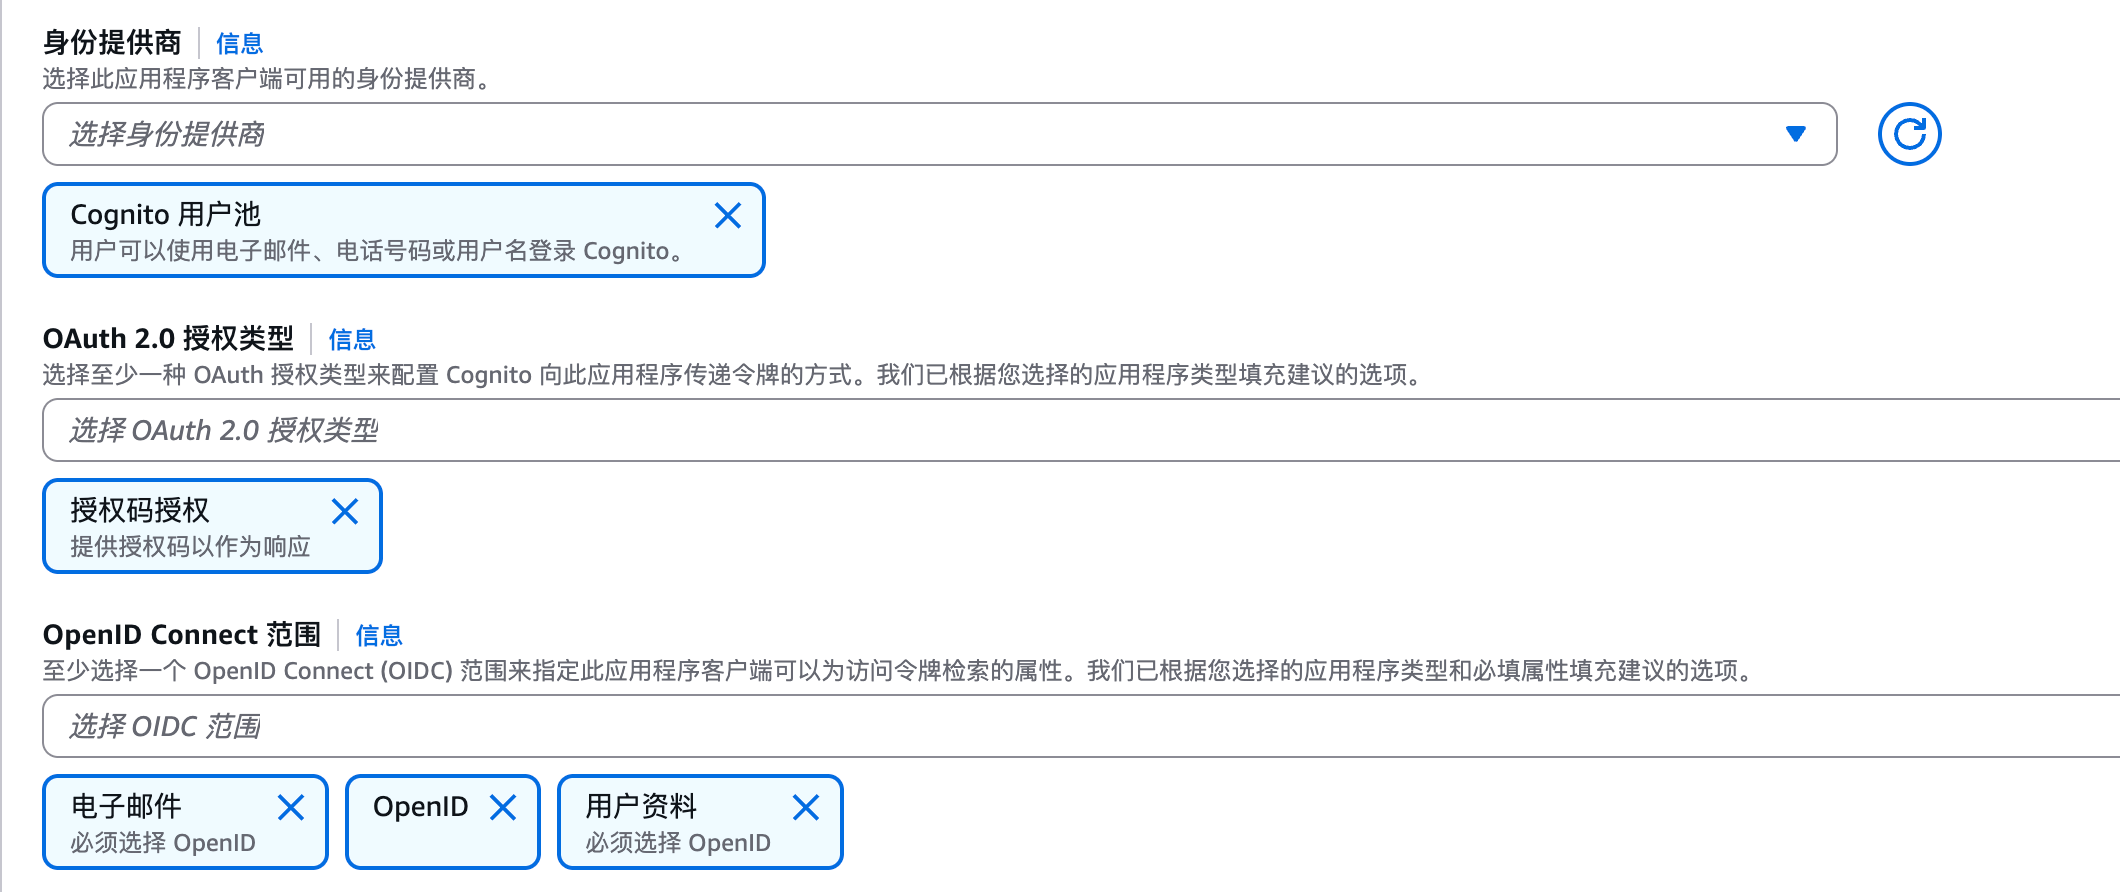
第一步:创建 Cognito App Client 在 Cognito 控制台创建一个 App Client,因为我做了端口映射,所以回调和注销的URL都是localhost:
勾选”生成客户端密钥”(Generate client secret)
认证流程勾选:授权码授权(Authorization code grant)、USER_PASSWORD_AUTH
OpenID Connect 范围选择:openid、profile、email
允许的回调 URL:http://localhost:5601/auth/openid/login
允许的注销 URL:http://localhost:5601
开启 Hosted UI 并配置 Cognito 域名
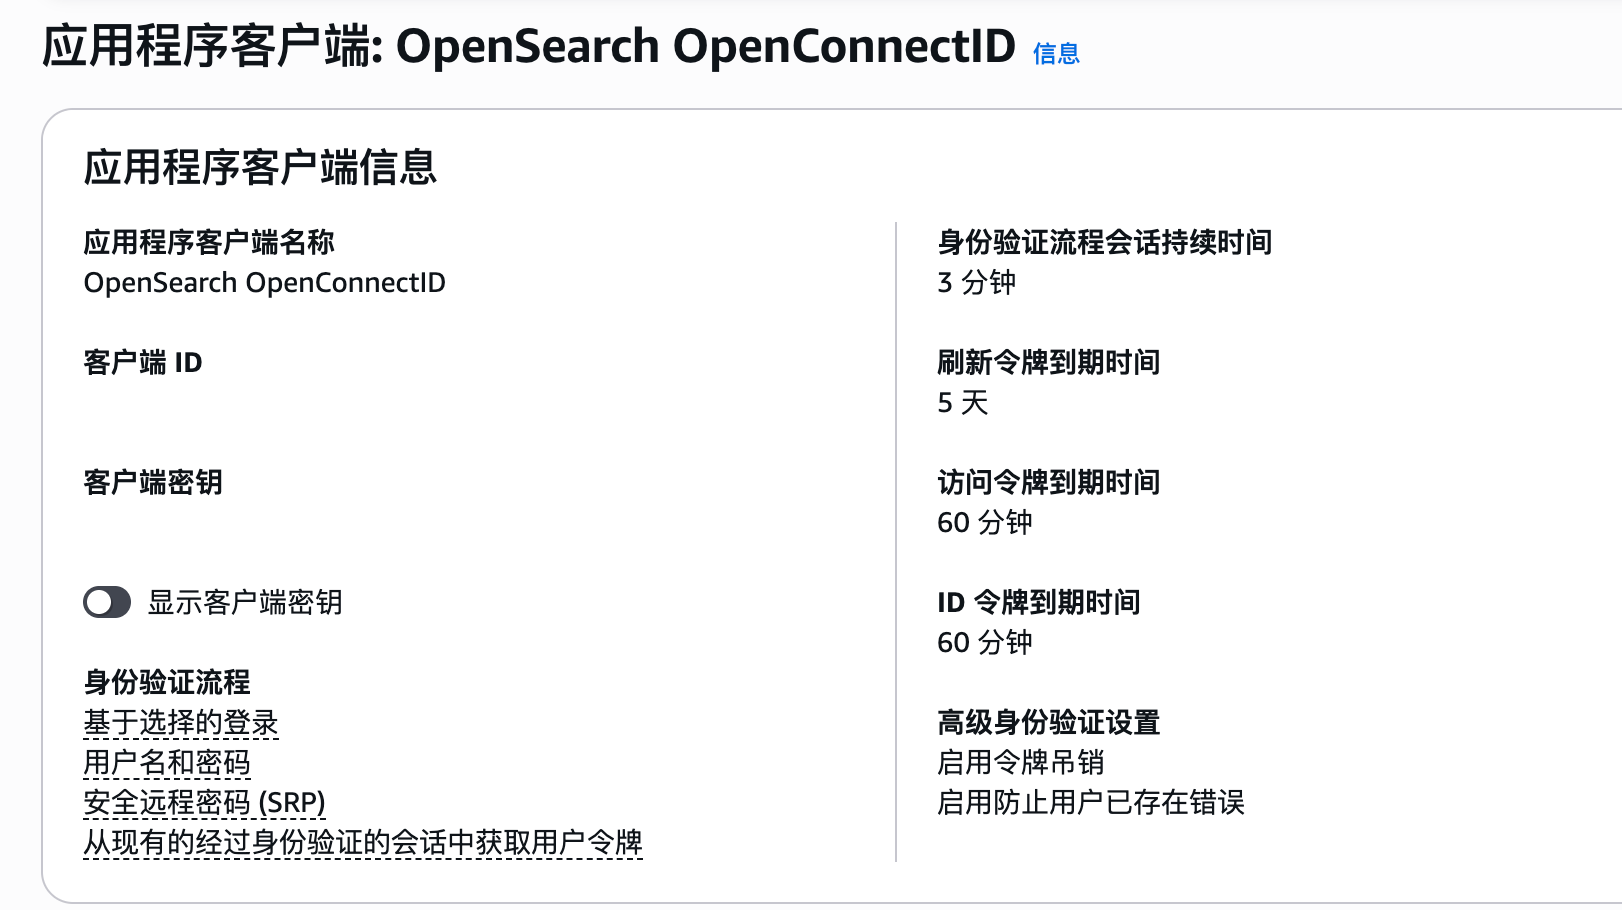
记录下 Client ID、Client Secret、User Pool ID。
创建用户后,Cognito 会将用户状态设为”强制更改密码”,可以通过 AWS CLI 将密码设为永久:
1
2
3
4
5
6
aws cognito-idp admin-set-user-password \ --user-pool-id <user-pool-id> \ --username <username> \ --password '<password>' \ --permanent \ --region <region>
第二步:部署 Dashboards(前端跳转) 创建 dashboards-values.yaml,让 Dashboards 跳转到 Cognito 登录,其实就是配置OIDC的redirect_url,scope,client_id,client_secret 这些东西:
1
2
3
4
5
6
7
8
9
10
11
12
13
14
15
16
17
opensearchHosts: "https://opensearch-cluster-master:9200" config: opensearch_dashboards.yml: server.host: "0.0.0.0" opensearch.hosts: ["https://opensearch-cluster-master:9200" ] opensearch.ssl.verificationMode: none opensearch.username: "kibanaserver" opensearch.password: "kibanaserver" opensearch.requestHeadersAllowlist: ["Authorization" , "securitytenant" ] opensearch_security.multitenancy.enabled: false opensearch_security.auth.type: "openid" opensearch_security.openid.connect_url: "https://cognito-idp.<region>.amazonaws.com/<user-pool-id>/.well-known/openid-configuration" opensearch_security.openid.client_id: "<app-client-id>" opensearch_security.openid.client_secret: "<app-client-secret>" opensearch_security.openid.scope: "openid profile email" opensearch_security.openid.base_redirect_url: "http://localhost:5601"
接下来使用helm进行部署:
1 helm upgrade --install dashboards opensearch/opensearch-dashboards -f dashboards-values.yaml
几个注意点:
config 字段会完全覆盖 默认的 opensearch_dashboards.yml,不是合并。所以 server.host、opensearch.hosts 等基础配置必须写进去,否则 Dashboards 会启动失败opensearch.username/password 是 Dashboards 后端连接 OpenSearch 的服务账号(kibanaserver),即使用了 OIDC 登录也需要保留。OIDC 解决的是终端用户认证,kibanaserver 解决的是 Dashboards 进程和 OpenSearch 之间的后端通信Dashboards 启动比较慢(2-3 分钟),startup probe 允许最多 200 秒,耐心等待。
第三步:配置 OpenSearch Security(后端验证) Dashboards 配好后,用户能跳转到 Cognito 登录了,但 OpenSearch 集群还不认识 JWT Token,会返回 401。需要在 OpenSearch 的 Security 配置中添加 OIDC 认证域。
虽然 OpenSearch Helm chart 提供了 securityConfig 字段,理论上可以在 values.yaml 里注入安全配置。但实际上我的配置并没有成功,所以我使用了securityadmin 工具直接写入 security index的方式,这个办法不需要重启 OpenSearch,立即生效:
1
2
3
4
5
6
7
8
9
10
11
12
13
14
15
16
17
18
19
20
21
22
23
24
25
26
27
28
29
30
31
32
33
34
35
36
37
38
39
40
kubectl exec -it opensearch-cluster-master-0 -- bash -c ' cat > /tmp/config.yml << EOF _meta: type: "config" config_version: 2 config: dynamic: authc: basic_internal_auth_domain: http_enabled: true transport_enabled: true order: 0 http_authenticator: type: basic challenge: false authentication_backend: type: internal openid_auth_domain: http_enabled: true transport_enabled: true order: 1 http_authenticator: type: openid challenge: false config: subject_key: email roles_key: cognito:groups openid_connect_url: https://cognito-idp.<region>.amazonaws.com/<user-pool-id>/.well-known/openid-configuration required_audience: <app-client-id> authentication_backend: type: noop EOF /usr/share/opensearch/plugins/opensearch-security/tools/securityadmin.sh \ -f /tmp/config.yml \ -t config \ -icl \ -nhnv \ -cacert /usr/share/opensearch/config/root-ca.pem \ -cert /usr/share/opensearch/config/kirk.pem \ -key /usr/share/opensearch/config/kirk-key.pem'
关键参数说明:
subject_key: email — 用 JWT 中的 email 字段作为用户名,而不是默认的 sub(一串 UUID)roles_key: cognito:groups — 从 Cognito 用户组映射 OpenSearch 角色basic_internal_auth_domain — 保留 Basic Auth,让 admin 用户和 Fluent Bit 等内部服务仍可用用户名密码认证securityadmin.sh 通过 TLS 客户端证书(kirk.pem)认证,直接操作底层索引,写入后 OpenSearch 自动热加载
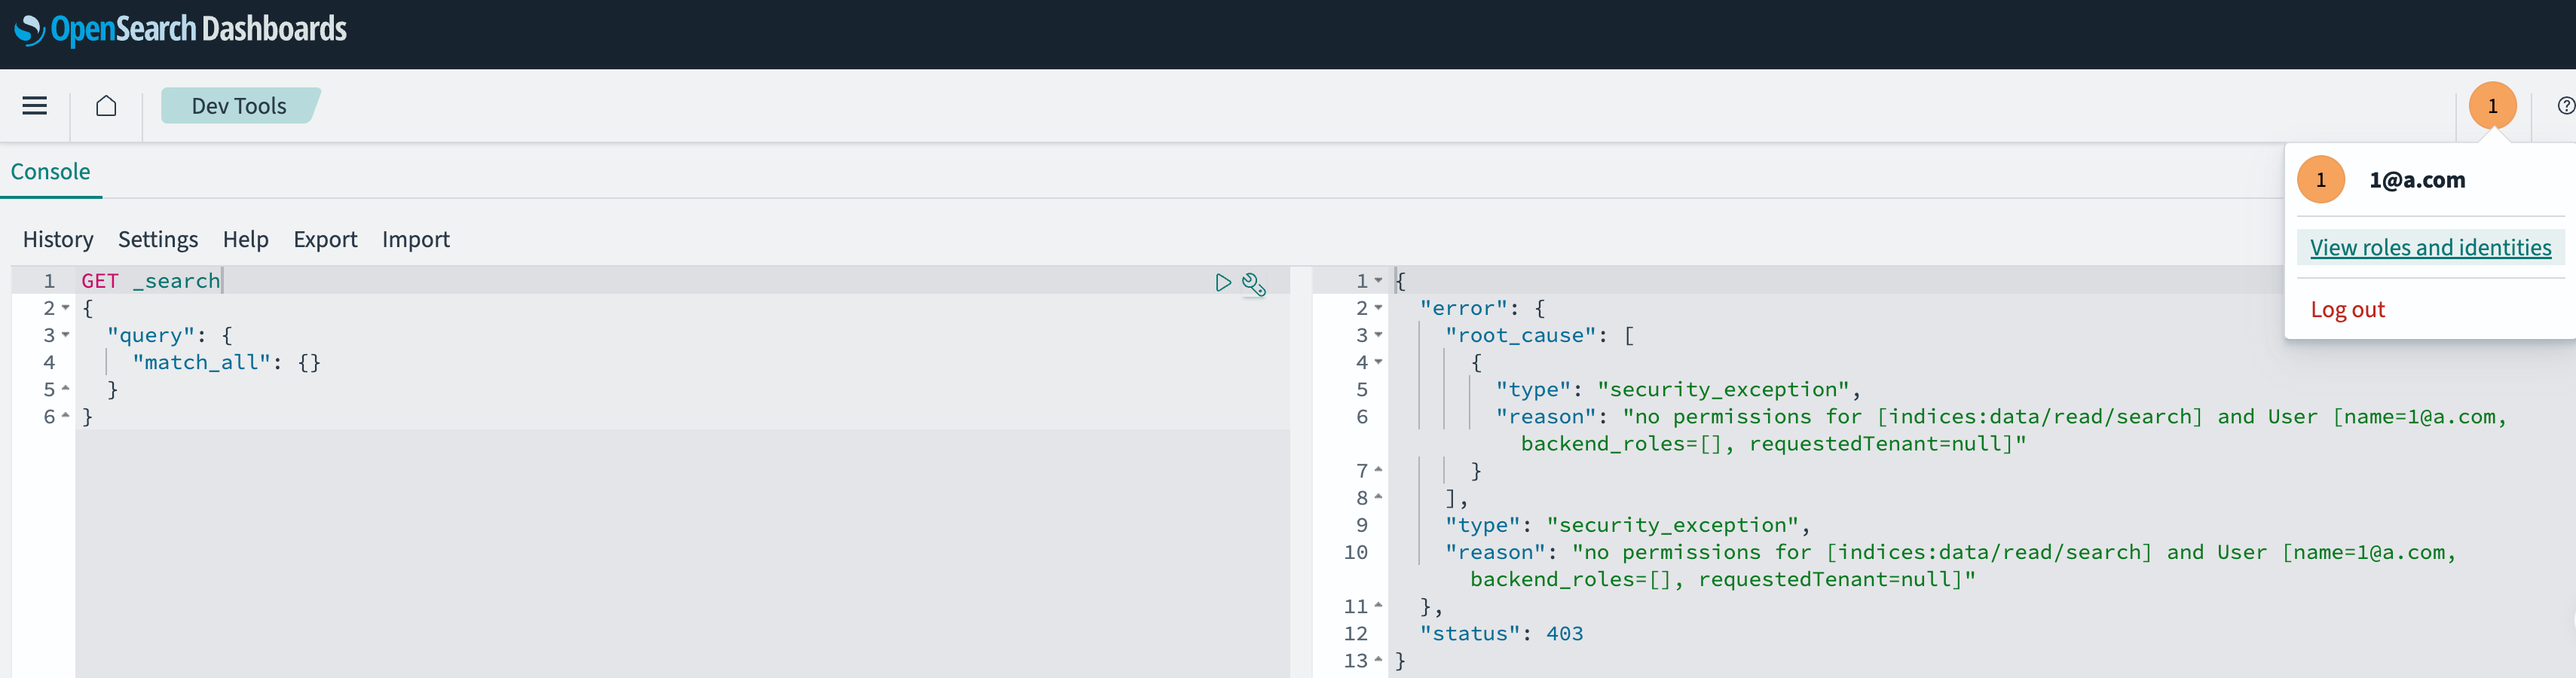
第四步:映射用户权限 联合登陆的用户登录后默认没有任何权限,接下来需要做角色映射:
1
2
3
4
5
6
7
8
9
10
11
12
13
{ "error": { "root_cause": [ { "type": "security_exception", "reason": "no permissions for [cluster:monitor/health] and User [name=1@a.com, backend_roles=[], requestedTenant=null]" } ], "type": "security_exception", "reason": "no permissions for [cluster:monitor/health] and User [name=1@a.com, backend_roles=[], requestedTenant=null]" }, "status": 403 }
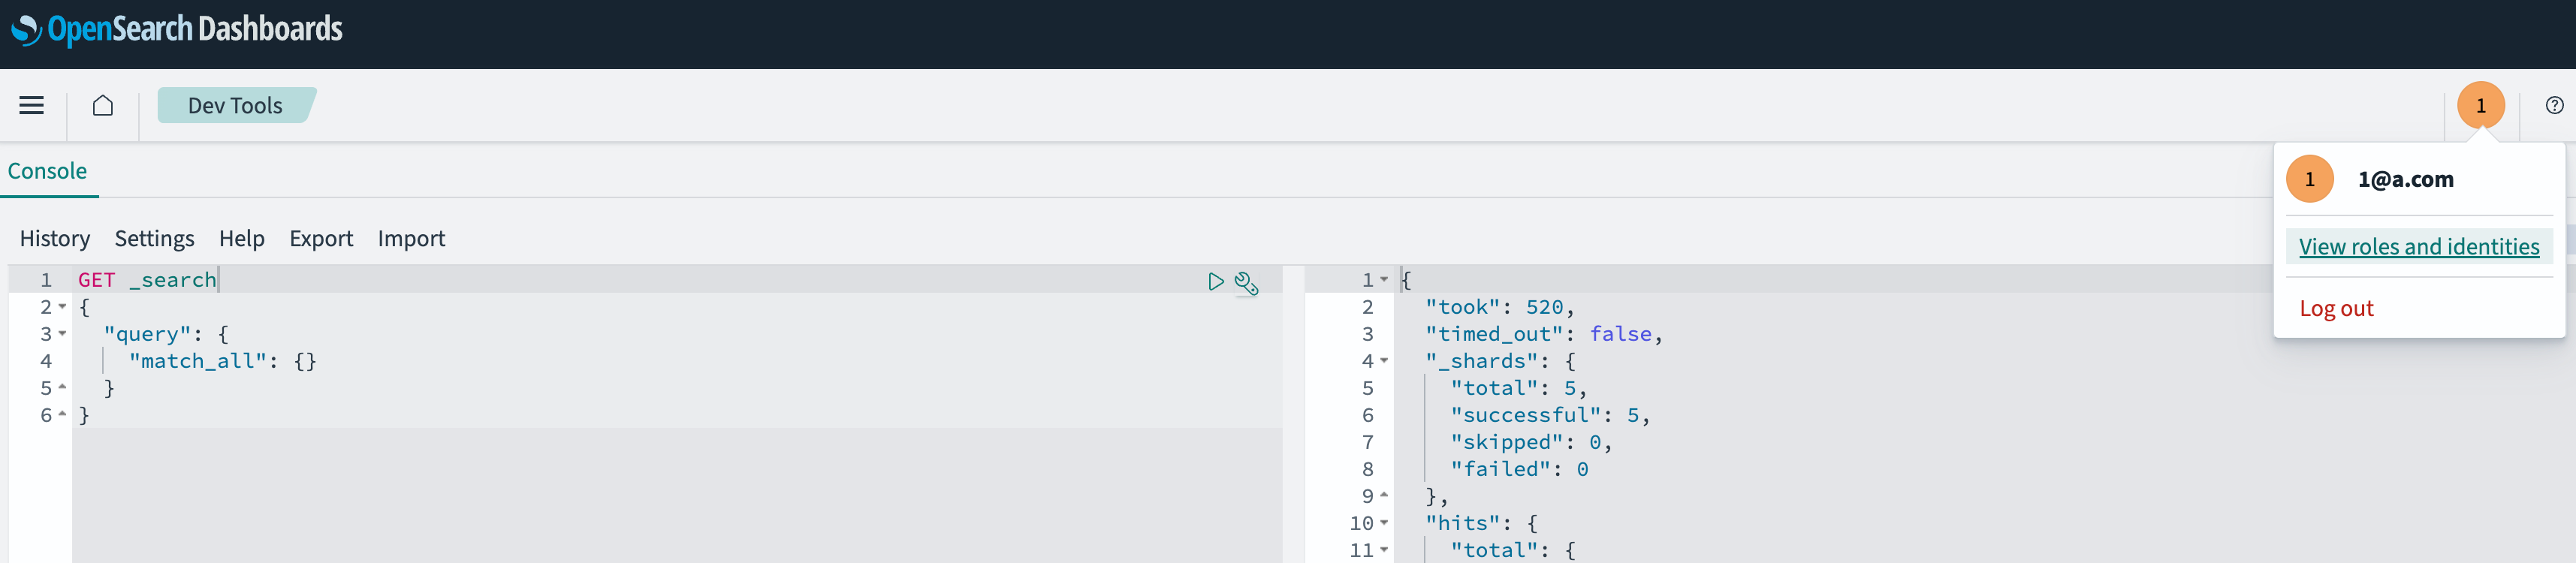
1
2
3
4
curl -sk -X PUT https://localhost:9200/_plugins/_security/api/rolesmapping/all_access \ -u 'admin:<your-password>' \ -H 'Content-Type: application/json' \ -d '{"users": ["your-email@example.com"]}'
生产环境建议通过Single Sign On用户组来映射角色,而不是直接映射单个用户。
第五步:Dashboard和OpenSearch集群验证JWT 由于Pod在k8s集群里,所以我们使用kubectl做端口转发。
1 kubectl port-forward svc/dashboards-opensearch-dashboards 5601:5601
浏览器打开 http://localhost:5601,应该会自动跳转到 Cognito 登录页面。
同样,OpenSearch也要做端口转发:
1 kubectl port-forward svc/opensearch-cluster-master 9200:9200
然后就可以使用Python脚本来进行验证了,通过Cognito API得到JWT,然后在请求OpenSearch的时候在header里带上Authorization Header。
1
2
3
4
5
6
7
8
9
10
11
12
13
14
15
16
17
18
19
20
21
22
23
24
25
26
27
28
29
30
31
import boto3, hmac, hashlib, base64, requestssecret_hash = base64.b64encode( hmac.new( '<client-secret>' .encode(), ('<username>' + '<client-id>' ).encode(), hashlib.sha256 ).digest() ).decode() client = boto3.client('cognito-idp' , region_name='<region>' ) resp = client.initiate_auth( ClientId='<client-id>' , AuthFlow='USER_PASSWORD_AUTH' , AuthParameters={ 'USERNAME' : '<username>' , 'PASSWORD' : '<password>' , 'SECRET_HASH' : secret_hash } ) token = resp['AuthenticationResult' ]['IdToken' ] r = requests.get( 'https://localhost:9200/_cluster/health?pretty' , headers={'Authorization' : f'Bearer {token} ' }, verify=False ) print (r.text)
总结梳理 1 2 3 4 5 6 7 8 9 10 11 12 13 14 15 16 17 18 19 20 21 22 helm install opensearch-cluster opensearch/opensearch \ --set replicas=2 \ --set 'envFrom[0].secretRef.name=opensearch-admin-secret' kubectl get pods -w kubectl exec -it opensearch-cluster-master-0 -- bash -c '...(securityadmin 命令)...' helm upgrade --install dashboards opensearch/opensearch-dashboards -f dashboards-values.yaml curl -sk -X PUT https://localhost:9200/_plugins/_security/api/rolesmapping/all_access \ -u 'admin:<password>' \ -H 'Content-Type: application/json' \ -d '{"users": ["your-email@example.com"]}' kubectl port-forward svc/dashboards-opensearch-dashboards 5601:5601
感谢有了单点登录,让我们管理OpenSearch的时候更加丝滑~